Page 1 of 5
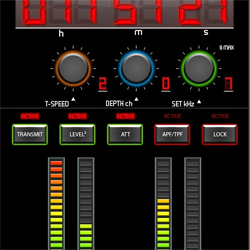
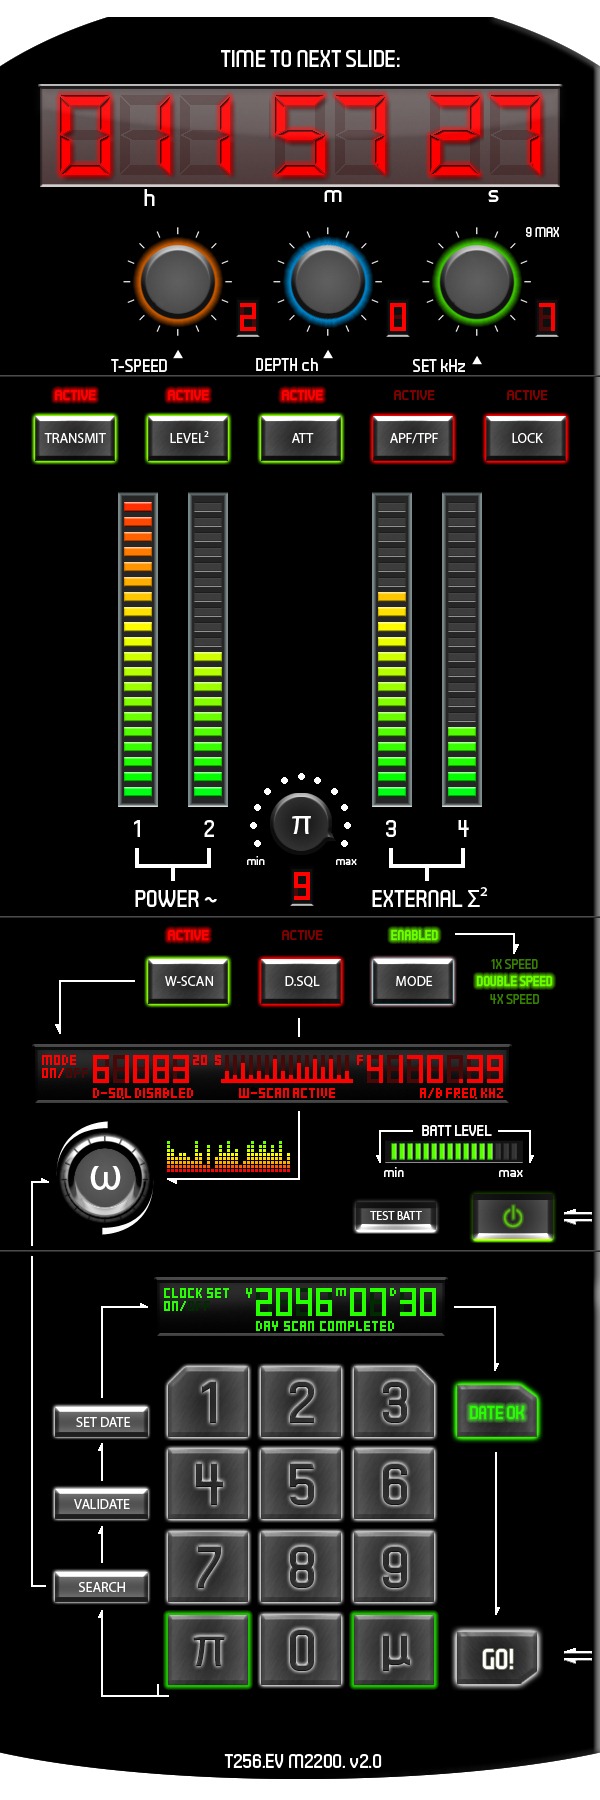
Learn how to draw this Stargate timer in Photoshop. In addition to drawing, you will learn how to setup the ruler and create guides to align the elements properly.
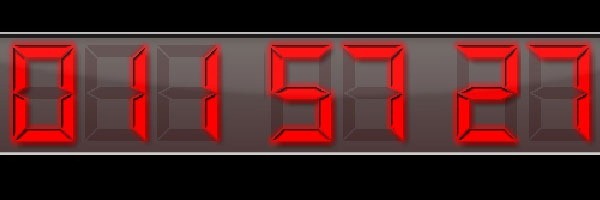
Preview of Final Results
Stargate Timer Photoshop Tutorial
Step 1 – Correct Your Ruler System
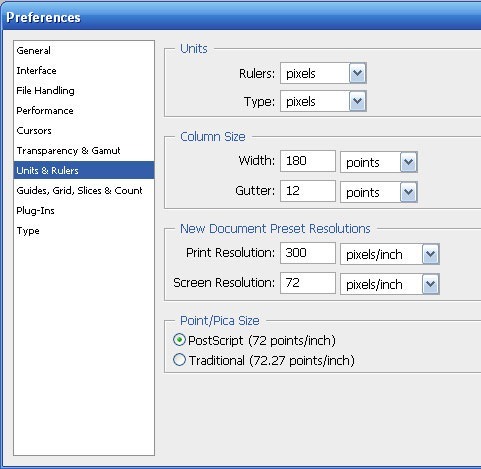
To use the correct ruler system, first make the ruler visible (Enable rulers > View > Rulers). Then, under Preferences (Edit > Preferences), select “Units & Rulers,” and set the units to “pixels.” Then select “Guides, Grid, Slices & Count” in the left menu and set the colour of your rulers. Drag your ruler to the top left corner of your document.
Step 2 – Create a layout of the timer shape
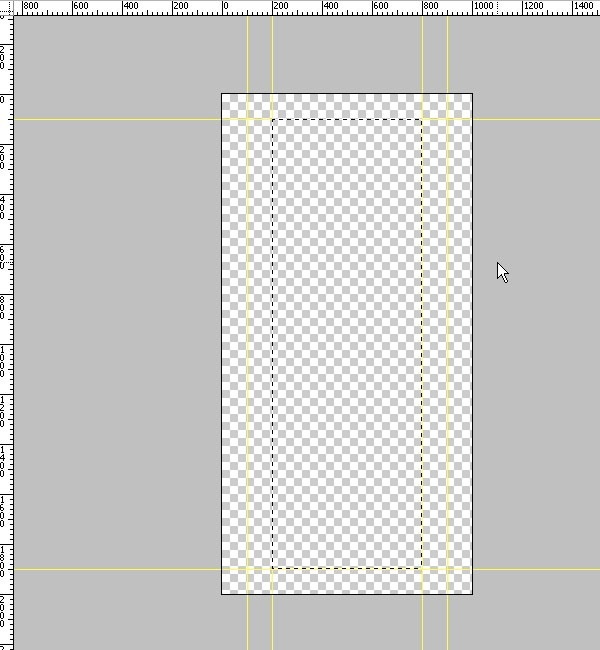
Create a new document with a width of 1000 and a height of 2000. Make some rulers as shown in the image below. Draw a selection between the rulers, with a width of 600 and a height of 1800.
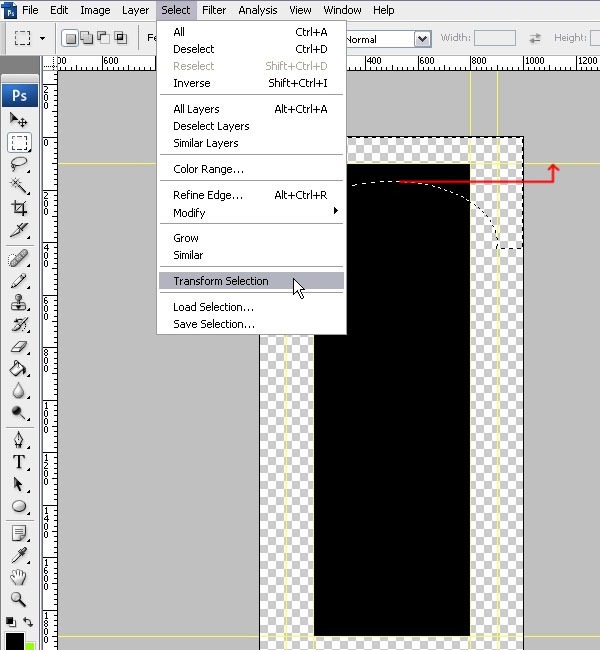
Paint the selection black (#000000). In the same layer, create an elliptical selection like shown below. Keep the selection between the ruler at 100 and 900. Then inverse the selection (Select > Inverse) and transform (Selection >> Transform Selection) this selection up (using your up arrow key or mouse) to the 100 ruler line. Then approve the transformation (Enter) and erase (Delete) sections of the black rectangle.
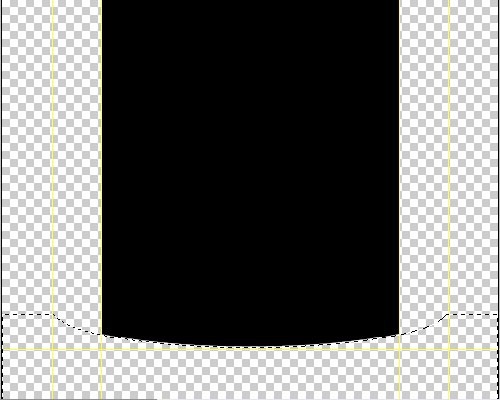
Do the same with the bottom.
Step 3 – Create the top display
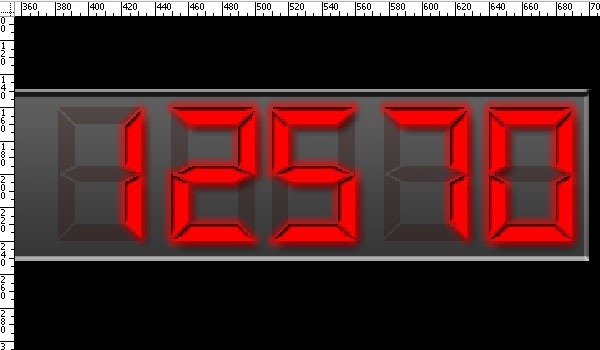
This is what you will make.
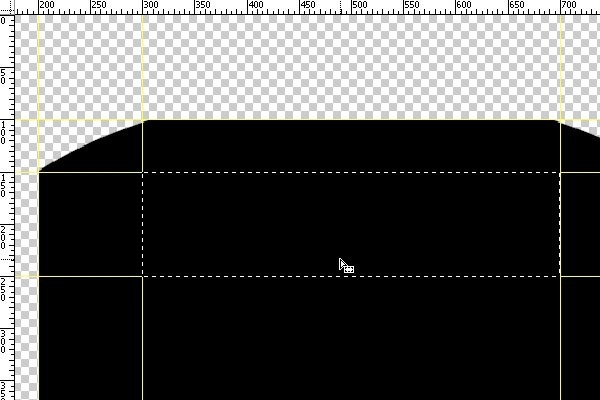
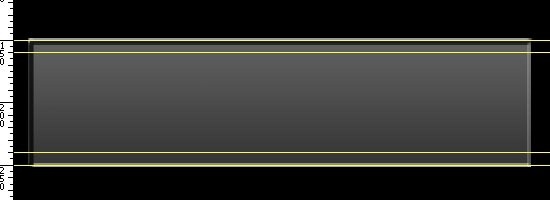
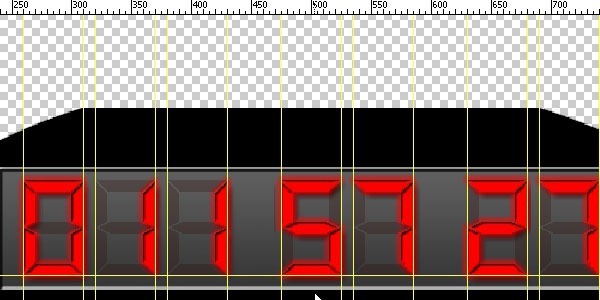
Create a horizontal grid line from a width of 300 to a width of 700. Then create a vertical grid line from a height of 150 to a height of 250. Create a new layer and make a new selection.
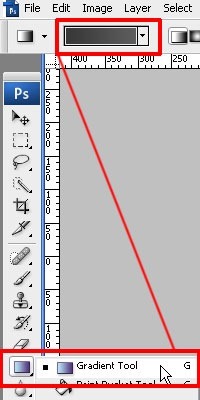
Paint the selection with a gradient. Use the colours #383838 and #5d5d5d.
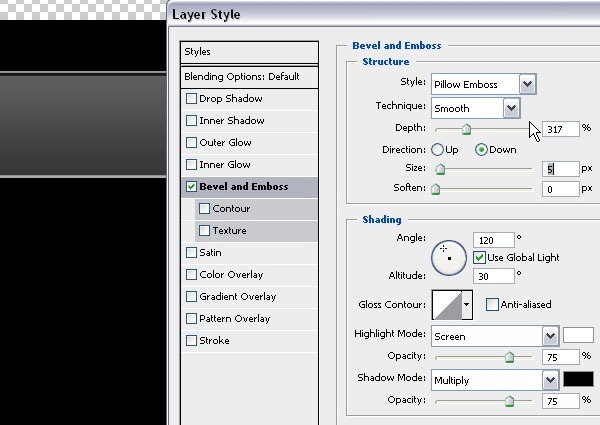
Then change the Bevel and Emboss preferences in the Layer Style (Right click > Choose > Blending Options) to the settings shown below.
Create two horizontal grid lines from a height of 160 and a height of 240. Stay within this height to create the digital numbers.
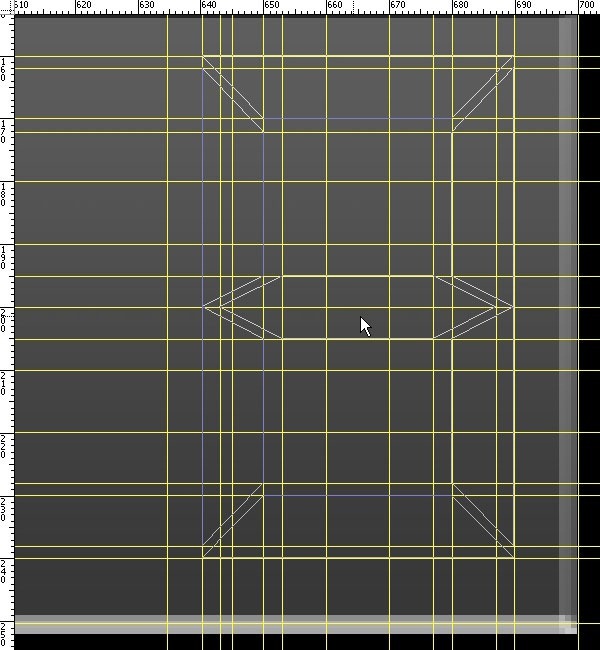
Create horizontal grid lines at a height of 162, 170, 172, 180, 190, 195, 200, 205, 210, 220, 228, and 230. Then create vertical grid lines at a width of 635, 640, 643, 645, 650, 653, 660, 670, 677, 680, 687, and 690. Make some diagonal lines as shown below.
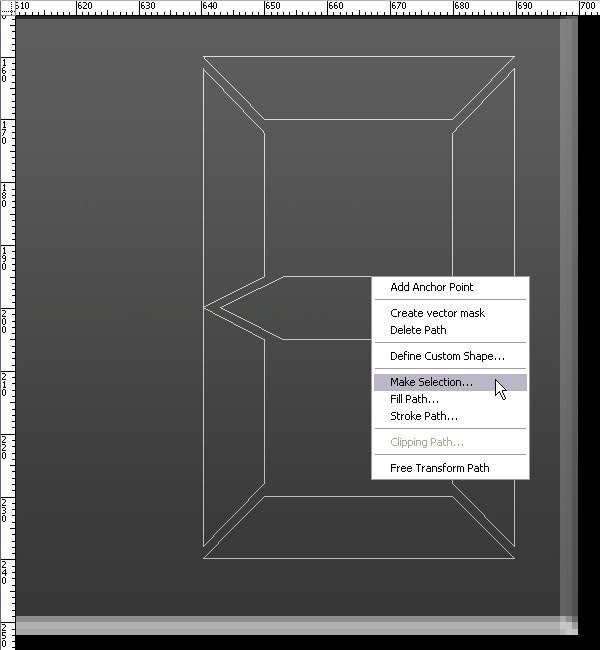
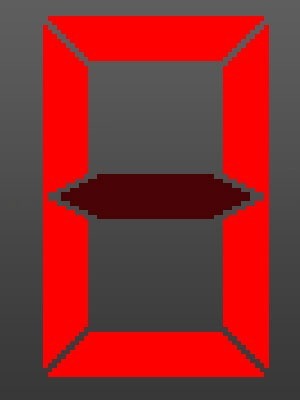
Select the Pen Tool (P), enable the “Paths” option, and create the number '8.' With 8, you can then create the other numbers.
Temporarily disable the ruler by (View > Extras). Make a selection (Right click > Make Selection). Set the Feather Radius to 0 and uncheck “Anti-Aliased.”
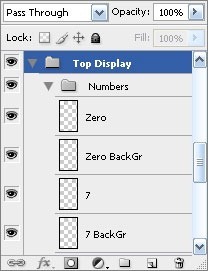
Create a layer and call it “Zero.” Use red (#FE0000) for the lines that would display the number 0. Create another layer for the line that would not be filled for that number and colour those lines brick red (#490305). Name it “Zero BackGr.”
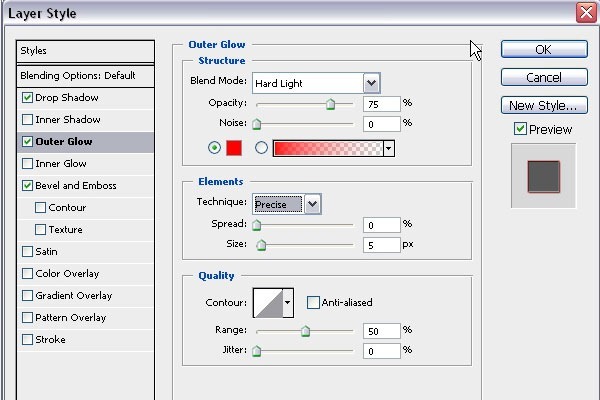
Select the layer labelled “Zero” and use the following Outer Glow settings in the Layer Style windows.
Then select “Drop Shadow” and use these settings.
Then select “Bevel and Emboss” and use these settings under “Inner Bevel.”
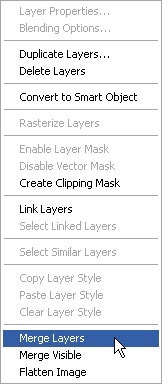
Create five different numbers each on their own layer, making sure there are two layers each. When you have created the numbers, merge the two layers together (Shift + Click both layers > Right Click > Merge Layers)
Your display is now complete.
Space the numbers out so that their edges are 10px from each other. For example, the first number begins at 260 and ends at 310, the next number should begin at 320, and so on.
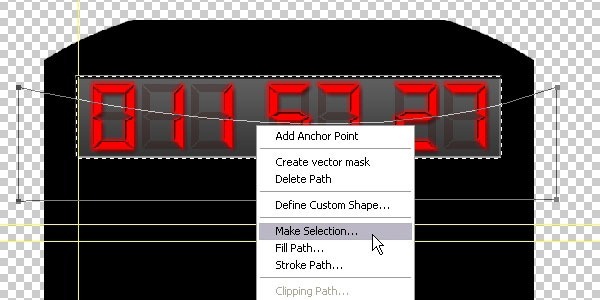
Create a layer over the display. Load the digital display rectangle (Ctrl+Click) and select the Pen Tool (P). Draw a path like the example shown below. Right click on the path and selection “Make Selection.” Before you hit “OK,” hold “Shift,” then click “OK.” The path will have deleted the bottom section of the selection.
Fill the selection white and set the opacity to 10-15%. Then blur (Filter > Blur > Gaussian Blur) it at 4px.
Posted in:
 Learn how to draw this Stargate timer in Photoshop. In addition to drawing, you will learn how to setup the ruler and create guides to align the elements properly.




0 komentar:
Posting Komentar